Wednesday 29 January 2014

Analytic Snapshot in salesforce


Analytic Snapshot in salesforce

Salesforce Help defines Analytic Snapshots ,it allowed you to load data from a Custom Report to a Custom Object on a regularly scheduled basis
/*
Need to Create Custom object to store data from report,
e.g  create an object AKG__AnalyticalSnapshot__c 
         Create fields on same object to map report fields ,datatype for report field and custom object must be same.
         You can create Analytic Snapshot only for Tabular and Summary type report.
*/
Step 1 :-  Click on Setup ==> Data Management ==>Analytic Snapshots         
    
                         Click on New Analytical Snapshot button 

Step 2 :- Enter all required information 


Step 3:-  Field Mappings


Step 3 :- Schedule Analytic Snapshot 


Tuesday 28 January 2014

Save point and Rollback in salesforce

/*
   Consider two objects:-  AKG__trans1__c and AKG__trans2__c

and AKG__trans1__c has field :-  Amount  (AKG__tr1Amount__c) field and
AKG__trans2__c has field :-  AKG__tr2Amount__c 

Suppose AKG__tr2Amount__c  is depends oAKG__tr1Amount__c field, and if AKG__tr1Amount__c is null then it will be roll back insert query on AKG__trans1__c.

*/

/*------------------------- VF page Code -------------------------------------*/
<apex:page controller="savepointRollbackCon" tabStyle="Account">
<apex:pageMessages />
<apex:form >
    <apex:pageBlock title="Transaction 1" >
            <apex:pageblockbuttons >
                <apex:commandButton value="SAVE!!" action="{!savemethod}"/>
            </apex:pageblockbuttons>
           
        <apex:pageblocksection title="Insert Trans1">
                <apex:inputField label="Name" value="{!trans1obj.Name}"/>
                <apex:inputField value="{!trans1obj.tr1Amount__c}"/>
           
       
        </apex:pageblocksection>
       
    </apex:pageBlock>
</apex:form>  
</apex:page>

/*-------------------------------controller Code ---------------------------*/

public with sharing class savepointRollbackCon {
     public AKG__trans1__c trans1obj{get;set;}          
     public AKG__trans2__c trans2obj{get;set;}    
                public savepointRollbackCon(){
               
                    trans1obj = new AKG__trans1__c();
                    trans2obj = new AKG__trans2__c();
                }
               
                public void savemethod(){
                //Declare Savepoint
                   Savepoint sp = Database.setSavepoint();
                 insert trans1obj;
             
                try{
         
               
                trans2obj.Name= trans1obj.name;
               
             
                 trans2obj.tr2Amount__c= trans1obj.tr1Amount__c + 20;
               
                 insert trans2obj;
               
               
                }
                catch(Exception e){
                // Use Rollback 
                Database.rollback(sp);
                    ApexPages.addMessage( new ApexPages.message(ApexPages.Severity.Error,' MY ERRRR '+e)) ;
                }
               
                }
}

Thursday 23 January 2014

Creating Communities using Salesforce

Step 1:-  Enable Communities from (Customize ==> Communities)


 Step 2 :- Select Domain Name


Step 3 :- Select Tabs and pages visible in Community


Step 4 :- Branding is useful for looks and feels for community.


Step 5 :- Login page look


Step 6 :- Email send by from which id.


 Step 7 :- Click on publish button. 


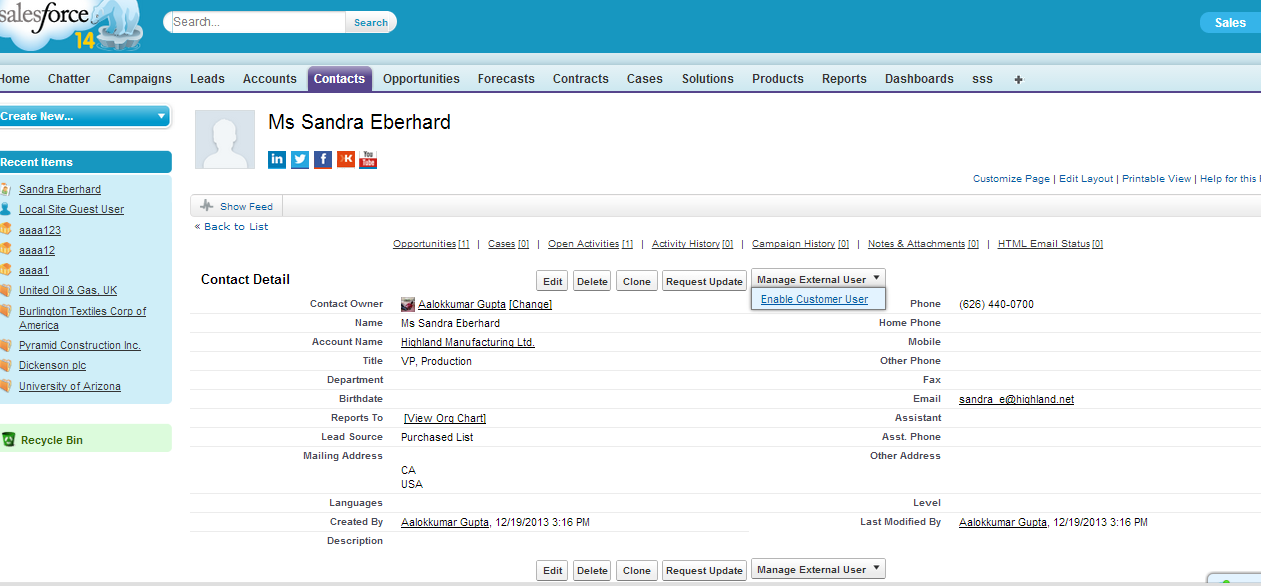
Step 8 :- Activate Contact to User Community 

Step 9 :- Change USER License 

Step 9 :- User Get A welcome mail 

Step 10 :-  Once user click on Activation Link He/ She will redirect on a new page to change password 


Step 11 :- After that User can use community and use chatter feature in it.


Step 12 :- and other user can participate in conversation.


Step 13 :- continue .... in conversations 

Step 15 :- continue .... in conversations 


Wednesday 22 January 2014

Retrieve data using Workbench or take backup of all meta data,classes ,trigger etc. using Workbench

To retrieve data from salesforce using workbench We need Package.xml. This package must contain all information about backup files.

package must be looks like following way :-


Steps to take backup:-
Step 1 :-  Click on migration and select Retrieve option.


Step 2:- Upload package.xml and click on Next button 


Step 3:- Click on Retrieve button.


Step 4:- Finally you get Download ZIP File.


You can use pacakge.xml file from Eclipse IDE


Monday 20 January 2014

Display Account information with similar Industry

/*
*/
<apex:page controller="vf10controller">
<apex:form >
    <apex:pageBlock >
        <apex:pageBlockButtons >
        <apex:commandButton value="Customer Direct Account" action="{!direct}"/>
        <apex:commandButton value="Customer - Channel Account" action="{!channel}"/>      
        </apex:pageBlockButtons>
        <apex:pageblocksection title="My account" >
            <apex:pageblocktable value="{!acts}" var="row"  >
            <apex:column >
            <apex:commandLink value="{!row.name}" action="{!racts1}" rerender="abc">
                <apex:param value="{!row.id}" name="aid"/>
                <apex:param value="{!row.name}" name="aname"/>    
                 <apex:param value="{!row.industry}" name="aindustry"/>              
             </apex:commandLink>
            </apex:column>
           
              <apex:column value="{!row.type}"/>
               <apex:column value="{!row.industry}"/>
            </apex:pageblocktable>
        </apex:pageblocksection>
     

           <apex:pageblocksection title="{!$CurrentPage.parameters.aname}" id="abc">
               <apex:detail subject="{!$CurrentPage.parameters.aid}"/>
                <apex:pageblocktable value="{!racts}" var="row"  >
             
              <apex:column value="{!row.Name}"/>
              <apex:column value="{!row.type}"/>            
               <apex:column value="{!row.industry}"/>
                </apex:pageblocktable>              
         
           </apex:pageblocksection>
     
    </apex:pageBlock>
</apex:form>
</apex:page>
-----------------------------
public class vf10controller {

    List<Account> r_acts;
   // string  type;
    List<Account> acts =  [SELECT name,type,industry,phone,ownerid FROM Account ];          
 
    public List<Account> getacts(){
            return acts;
    }
     public List<Account> getracts(){
            return r_acts ;
    }
 
    public PageReference direct(){
        //type = 'Customer - Direct';
            acts =  [SELECT name,type,industry,phone,ownerid FROM Account WHERE Type ='Customer - Direct'];
         
        return null;
    }
    public PageReference channel(){
      // type = 'Customer - Channel';
             acts =  [SELECT name,type,industry,phone,ownerid FROM Account WHERE Type = 'Customer - Channel'];      
                return null;
    }
 
    public pagereference racts1(){
    r_acts =[SELECT  name,type,industry,phone,ownerid FROM Account WHERE Industry =: ApexPages.CurrentPage().getParameters().get('aindustry') ];
    return null;
    }
}
--------------------


display detail using visualforce page and Ajax

<apex:page standardController="Account" recordSetVar="acts" sidebar="false">

<apex:form id="form">
<apex:pageBlock title="Account info">
 <apex:pageblockSection columns="2">
    <apex:pageblocktable value="{!acts}" var="a">
        <apex:column >
            <apex:commandLink value="{!a.name}" rerender="abc" >
                <apex:param name="aid" value="{!a.id}"   />
                <apex:param name="aname" value="{!a.name}"   />              
            </apex:commandLink>
        </apex:column>
       
        <apex:column value="{!a.type}"/>
           
    </apex:pageblocktable>
   
     <apex:pageblockSection id="abc" title="{!$CurrentPage.parameters.aname}">
    <apex:detail subject="{!$CurrentPage.parameters.aid}" relatedList="false"/>
    </apex:pageblockSection>
   
   
     </apex:pageblockSection>
   
</apex:pageBlock>

 </apex:form>
</apex:page>

Use Tab in Visualforce page :Salesforce

/*
 pass account id in url e.g. https://c.ap1.visual.force.com/apex/vf4?id=0019000000lw1tK
*/

<apex:page standardController="account">
    <apex:pageBlock title="{!account.Name}">
        <apex:tabPanel id="tabpanel">
            <apex:tab Label="Details" reRender="tabpanel" switchType="ajax">
                    <apex:detail relatedList="false"/>
            </apex:tab>
             <apex:tab Label="Contact" reRender="tabpanel" switchType="ajax">
                    <apex:relatedList list="Contacts"/>/>
            </apex:tab>
           
            <apex:tab label="opportunities" reRender="tabpanel" switchType="ajax"  >
            <apex:detail relatedList="false"/>
           
            </apex:tab>
           
           
            <apex:tab label="cases" reRender="tabpanel" switchType="ajax">
            <apex:detail relatedList="false"/>
           
            </apex:tab>
        </apex:tabPanel>
    </apex:pageBlock>
</apex:page>

Friday 17 January 2014

Insert in custom object using VF page and custom controller and use trigger with class

/*
     Insert values on an Custom Object using VF page and custom controller as well as on basis of this use a trigger to insert value in another Custom object  using a trigger and a class.
*/
/*
Consideration following for below code :-
your object names :- AKG__A__c,  AKG__B__c
VF page name:- t1ONACon , controller name :- t1ONACu
Apex Trigger name :- InsertOnB , Apex Class :- trgInsobjB

*/
VF page name:- t1ONACon
<apex:page controller="t1ONACu" >

<apex:pageMessages />
<apex:form >
        <apex:outputLabel value="Saved Successfully!"  style="font-weight:bold;color:green" rendered="{!errFlag}"/>
 <apex:pageBlock title="Insert object A">

     <apex:pageblockButtons >
         <apex:commandButton value="Save!!" action="{!savemethod}"/>
     </apex:pageblockButtons>
  <apex:pageblocksection title="Basic Information">
      <apex:inputField value="{!Aobjstr.name}"/>
     <apex:inputField value="{!Aobjstr.aaa__c}"/>
  </apex:pageblocksection>
 </apex:pageBlock>
</apex:form> 
</apex:page>
 Controller name :- t1ONACu
public with sharing class t1ONACu {

public AKG__A__c Aobjstr {get;set;}
public boolean errFlag{get;set;}

public t1ONACu(){
 Aobjstr= new  AKG__A__c();
 errFlag = false;
}
public void savemethod(){
 
  try{
   insert Aobjstr;
   errFlag = true;
   
   }
   catch(Exception e){
   errFlag = false;  
   ApexPages.addMessage( new ApexPages.message(ApexPages.Severity.Error,'MY ERRRR'+e)) ;
   
   
   }


}

}

Apex Trigger name :- InsertOnB 

trigger InsertOnB on A__c (After insert) {

set<id> objAId = new set<id>();

if(trigger.isinsert){
    for(A__c a:Trigger.new){
    
        system.debug('~~~~~~a'+a);
        objAId.add(a.id); 
    }
        system.debug('~~~~~~objAId'+objAId);
       
        trgInsobjB clsB = new trgInsobjB();
        clsB.insertObjB(objAId,Trigger.new);
}

}

 Apex Class :- trgInsobjB 

public with sharing class trgInsobjB{

    public void insertObjB(set<id> aid,A__c[] Alist ){

    Id myid= new List<id>(aid)[0];
    System.debug('~~~~~~InSide Class aid '+aid+' ~~~~~ Alist '+Alist+'~~~~myid '+myid);
        
        if(aid != null)
        {
            AKG__B__c B = new AKG__B__c();
            B.name = Alist[0].Name+ 'FRM A';
           B.AKG__B_A__c  = myid;
           B.AKG__OnB__c = myid;
    insert B;            
        }

    }
}


Friday 10 January 2014

custom dependent picklist in visualforce

VF page CODE :-
<apex:page controller="custcon" tabStyle="Account" >
    <apex:form >


<apex:selectList required="true" multiselect="false" size="1" label="Type"  value="{!selectedValue}" >
<apex:selectOptions value="{!P1}"/>
<apex:actionSupport event="onchange" reRender="a"/>
</apex:selectList>


<apex:selectList required="true" multiselect="false" size="1" label="Type"   id="a">
<apex:selectOptions value="{!P2}"/>

</apex:selectList>      


    </apex:form>
</apex:page>
--------------------------------controller code
public with sharing class custcon {

public String selectedValue{get;set;}

public String selectedP2{get;set;}
public Boolean ShowP2;

    public custcon(){
       System.debug('~~~~~~~~~~~~selectedValue in controller~~~~~~~~~~~~~~~~ '+selectedValue);
    }
   
//get first picklist value
public List<SelectOption> getP1(){
System.debug('~~~~~~~~~~~~selectedValue in getP1~~~~~~~~~~~~~~~~ '+selectedValue);
List<SelectOption> options = new List<SelectOption>();

options.add( new SelectOption('None','--None--'));
options.add(new SelectOption('A','A'));
options.add( new SelectOption('B','B'));
return options;


}

public void setP1(String s){
    this.selectedValue = s;
    System.debug('~~~~~~~~~~~~setP1~~~~~~~~~~~~~~~~ '+s);
     System.debug('~~~~~~~~~~~~selectedValue in setP1~~~~~~~~~~~~~~~~ '+selectedValue);
   // this.ShowP2= true;
}

//Child Picklist Value

public List<SelectOption> getP2(){
System.debug('~~~~~~~~~~~~GETP2~~~~~~~~~~~~~~~~ '+selectedValue);
List<SelectOption> options = new List<SelectOption>();
options.add(new SelectOption('None','--None--'));

    if(selectedValue == 'A') {
    options.add(new SelectOption('aa','aa'));
    options.add(new SelectOption('aaa','aaa'));
    }
else
    if(selectedValue == 'B'){
    options.add(new SelectOption('bb','bb'));
    options.add(new SelectOption('bbb','bbb'));
    }
return options;

}
public void setP2(String s){
    this.selectedP2 =s;
   // this.ShowP2= true;
}

}